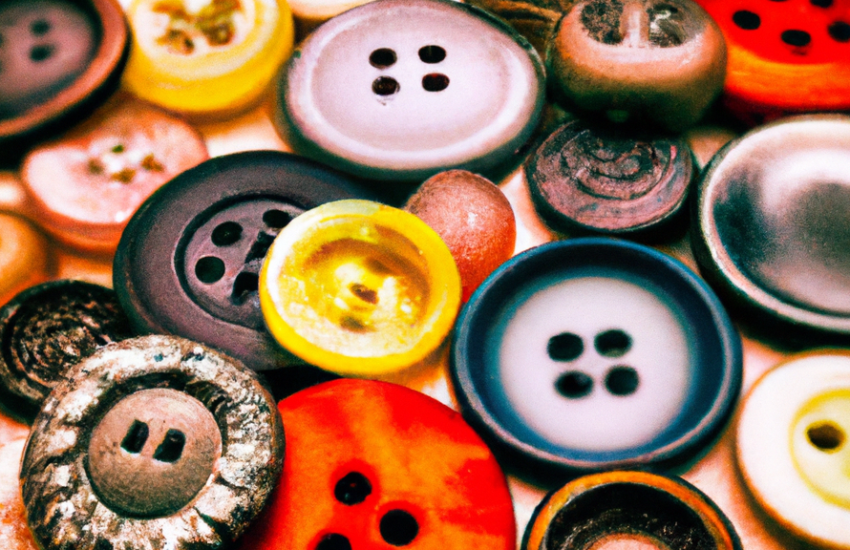
THE ART OF BUTTON DESIGN: TECHNIQUES FOR DEVELOPING CUSTOMIZED SOLUTIONS
Buttons are an essential part of our daily lives, from the buttons on our clothes to the buttons on our electronic devices. However, have you ever stopped to consider the art and science behind button design? The truth is, button design is a crucial aspect of product design, and it can make or break the success of a product. In this blog post, we will explore the art of button design and the techniques for developing customized solutions that meet the needs of your product and users.
Whether you are an inventor, designer, or product developer, understanding the principles of button design can help you create products that are not only functional but also aesthetically pleasing and user-friendly. So, let’s dive into the world of button design and discover how you can take your product design to the next level.
THE ART OF BUTTON DESIGN: TECHNIQUES FOR DEVELOPING CUSTOMIZED SOLUTIONS
Buttons are an essential part of our daily lives. From the buttons on our clothes to the buttons on our electronic devices, they are everywhere. However, have you ever stopped to think about the design of these buttons? The art of button design is a crucial aspect of product design, and it can make or break the success of a product. In this article, we will explore the techniques for developing customized solutions for button design.
1. Understand the Purpose of the Button
Is it a functional button, or is it a decorative button? Functional buttons are used to perform a specific action, such as turning on a device or adjusting the volume. Decorative buttons, on the other hand, are used to enhance the aesthetic appeal of a product. Once you have identified the purpose of the button, you can start to think about the design.
2. Consider the Shape of the Button
The shape of the button is an essential aspect of button design. The shape should be easy to identify and easy to press. The most common shapes for buttons are:
- Circular
- Square
- Rectangular
However, designers can also experiment with other shapes, such as triangular or hexagonal. The shape of the button should also be consistent with the overall design of the product. For example, if the product has a modern design, the button should have a sleek and modern shape.
3. Determine the Size of the Button
The size of the button is also crucial. The button should be large enough to be easily pressed, but not so large that it takes up too much space on the product. The size of the button should also be consistent with the overall size of the product. For example, if the product is small, the button should be small as well.
4. Choose the Color of the Button
The color of the button is another important aspect of button design. The color should be easy to see and should contrast with the color of the product. For example, if the product is black, a white button would be easy to see. The color of the button can also be used to convey a message. For example, a red button could indicate danger, while a green button could indicate safety.
5. Consider the Texture of the Button
The texture of the button is also important. The texture should be easy to grip and should provide feedback to the user when pressed. The most common textures for buttons are smooth and ridged. Smooth buttons are easy to press, but they do not provide much feedback. Ridged buttons, on the other hand, are harder to press, but they provide more feedback.
6. Determine the Placement of the Button
The placement of the button is also crucial. The button should be placed in a location that is easy to reach and easy to see. The most common placement for buttons is on the front of the product, near the top. However, designers can also experiment with other placements, such as on the side or on the back.
7. Choose the Material of the Button
The material of the button is also important. The material should be durable and should not wear out easily. The most common materials for buttons are plastic and metal. Plastic buttons are lightweight and inexpensive, but they can wear out over time. Metal buttons are more durable, but they are also more expensive.
8. Use Technology to Develop Customized Solutions
Customized solutions for button design can be developed by using a combination of these techniques. For example, a functional button could be designed with a circular shape, a medium size, a red color, a ridged texture, and a placement on the front of the product. A decorative button, on the other hand, could be designed with a triangular shape, a small size, a green color, a smooth texture, and a placement on the back of the product.
In addition to these techniques, designers can also use technology to develop customized solutions for button design. For example, 3D printing can be used to create buttons with unique shapes and textures. Virtual reality can be used to test the placement of buttons on a product before it is manufactured. Augmented reality can be used to show users how to use a product with buttons that are not labeled.
Conclusion
In conclusion, the art of button design is a crucial aspect of product design. The shape, size, color, texture, placement, and material of the button all play a role in the success of a product. Customized solutions for button design can be developed by using a combination of these techniques and by using technology. By paying attention to the design of buttons, designers can create products that are both functional and aesthetically pleasing.
- 4 techniques for creating mockups to show off your designs …
Here are the top 4 ways to create mockups: Create a custom mockup from scratch; Create reusable mockup templates; Use a mockup generator website; Use a mockup … - Custom Design Services: Easy-to-Use Templates | FedEx Office
Quickly and easily design beautiful flyers, menus, cards, and more to address the changing needs of your business. You don’t need to shell out precious time and … - Wix Editor: Customizing the Design of Your Buttons | Help Center …
Create beautiful, eye-catching buttons that match your site and attract your visitors to interact. Click the Design icon on your button to start customizing … - Wix.com: Website Builder – Create a Free Website Today
Create a website with Wix’s robust website builder. With 900+ strategically designed templates and advanced SEO and marketing tools, build your brand online … - CSS-Tricks – Tips, Tricks, and Techniques on using Cascading Style …
Daily articles about CSS, HTML, JavaScript, and all things related to web design and development. - Responsive Web Design: What It Is And How To Use It — Smashing …
Aug 11, 2018 … Responsive Web design is the approach that suggests that design … It’s obvious that we can’t keep creating custom solutions for each one. - Orthopedic Conditions | El Camino Health
Rehabilitation experts provide personalized, one-on-one therapy, … experienced in developing customized care programs to meet each person’s unique needs. - Unity Real-Time Development Platform | 3D, 2D, VR & AR Engine
Create and grow real-time 3D games, apps, and experiences for entertainment, film, automotive, architecture, and more. Get started with Unity today. - Autodesk | 3D Design, Engineering & Construction Software
Autodesk is a global leader in design and make technology, with expertise across architecture, engineering, construction, design, manufacturing, … - Cisco: Networking, Cloud, and Cybersecurity Solutions
Cisco delivers innovative software-defined networking, cloud, and security solutions to help transform your business, empowering an inclusive future for …
Interesting facts about The Art of Button Design: Techniques for Developing Customized Solutions
- The first patent for a button was issued in the United States in 1853.
- Buttons were originally made from materials such as bone, wood, and ivory before metal buttons became popular.
- The use of buttons on clothing dates back to ancient civilizations such as Egypt and Rome.
- In the 18th century, buttons were used as a form of social status symbol with wealthy individuals wearing gold or silver buttons while commoners wore brass or pewter ones.
- During World War II, rationing led to the use of alternative materials for button production including plastic and vegetable ivory (from tagua nuts).
- Button collecting is known as “buttonology” and has been a hobby since the early 20th century with collectors often focusing on specific types or eras of buttons.
- Some cultures have superstitions surrounding button placement – for example, it is believed that placing an uneven number of buttons on clothing brings good luck in Russia while even numbers are considered unlucky in China.
- Buttons can be used beyond just fastening clothes – they can also be decorative elements on accessories like bags or shoes or functional components like switches on electronics devices

Are you ready to become an inventor?
Getting your idea out of your head and into your hands is only the first in a long set of steps towards becoming a successful inventor.

First Steps To A Successful Invention
At Invention Therapy, we believe that the power of the internet makes it easier than you think to turn your invention idea into a reality. In most cases, you can build a prototype and start manufacturing a product on your own. Changing your way of thinking can be difficult. Being an inventor requires you to balance your passion with the reality of having to sell your products for a profit. After all, if we can't make a profit, we won't be able to keep the lights on and continue to invent more amazing things!Please subscribe to our Youtube Channel!
