
You have a great invention idea and have already figured out that the only way it will be successful is if you can get a prototype made. Building a prototype may seem like an expensive and impossible task, but with computer technology these days, its a lot easier than you think. If you are patient you may even be able to build your prototype for much less money than you imagined.
Question: How do you get a prototype of your invention made?
Answer: The most direct answer is that you first build your prototype in the virtual world. Once your product is designed on the computer, you use simple manufacturing processes to turn your invention idea into reality.
The steps to make your prototype.
1. Sketch your idea.
Putting your ideas on paper or on the computer is the first important step in the invention process. If you don’t know how to sketch, don’t worry because I was never very good at it either. You can use a computer or a piece of paper and a pencil. It doesn’t matter at this phase. You are just trying to inspire yourself and get some ideas down for you to review. You can read more about sketching your invention idea here.
Sketching can be one of the most critical parts of the invention process. The more time you can spend thinking and doodling, the less time you will have to spend working out the details of what your product will look like. Style and function go hand in hand so it is not unusual that the look of your design will be dependant on the functions that are incorporated into the product.
Likewise, the functionality of the product can also change depending on the choices you make regarding the product’s style. This may sound strange but once you start working in the CAD program, you will begin to understand what I mean.
2. Create a model in CAD.
This is part of the invention process that is really fun. Building prototypes has never been easier because most of the work can now be done inside the computer. This substantially reduces the amount of time needed to develop your product and release it to the market.
Up until recently, in order to design and build your invention idea, it would take a team of experienced engineers and craftsmen to shape that idea into a working product that could be held in your hand. With computers, we can test every part, fit and function inside the computer. This amazing advancement in technology is the secret that most “invention help” companies don’t want you to know.
If you are on a budget and don’t have the money to build your invention, designing it in the digital world is the next best thing. It will allow you to work on your idea without spending any money and more importantly, show potential investors what you are capable of dreaming up.
If you think about it, you will realize that not having a budget to build your product is no longer a valid excuse. If we can complete our design virtually, we can eliminate 90% of the expenses associated with inventing a product.
The better you get using software to design your invention idea, the lower your start-up costs will become. The only real expense in bringing your idea to reality will be the time it takes you to learn the software.
Depending on your invention idea, there will be a few choices for the programs that we recommend using during the design phase.
Mechanical Design Software
- Dassault Systems – Solidworks
- Autodesk – Fusion 360
- IMSI Design – Turbocad
Although Solidworks and Fusion 360 can be expensive, they do offer student licenses for around one hundred US dollars. If you or a family member are a student, I suggest you take advantage of this opportunity.
Electronic Design Software
If you are designing an electronic device, it is very likely that you will be using more than one of these software programs to complete your prototype. Electronic products usually have some sort of enclosure or case that will need to be designed.
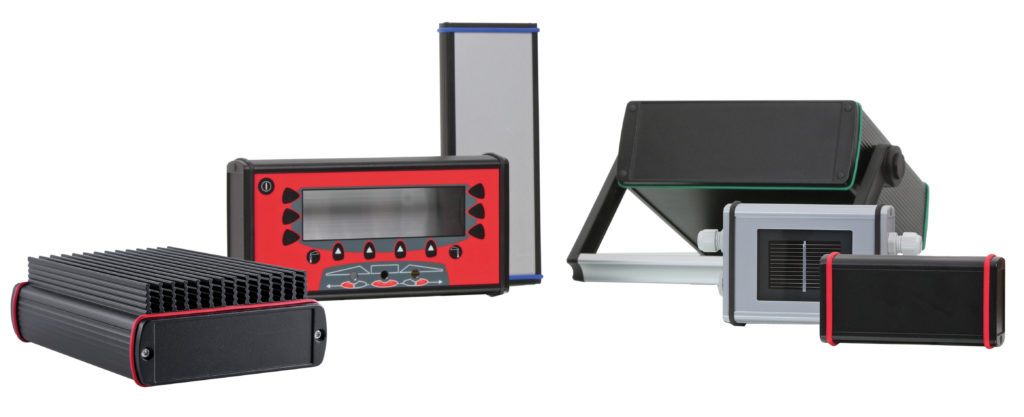
For your first electronic invention, we recommend using an off the sheld enclosure and avoid plastic injection molded cases. This will significantly reduce your upfront costs as mold design can get very expensive. In fact, by using off the shelf enclosures, electronic products are usually the cheapest to bring to the marketplace.
Here is a more detailed look at the process and cost involved with plastic injection molded parts. It is up to you how you decide to proceed with your enclosure but keep in mind that the upfront costs and time involved in making a mold will slow down your invention process. If you haven’t designed injection molded parts before, it’s not a good idea to learn with your first invention.
Manufacturing processes.
- 1 Casting
- 2 Labeling and painting
- 3 Moulding
- 4 Forming
- 5 Machining
- 6 Joining
- 7 Additive manufacturing
- 8 Other
You will need to know which processes you will use to manufacture your parts before or during the design. You must learn to build your parts in software based on the processes that you choose. As an example, a flat sheet of metal with holes is manufactured very differently than a plastic part.
3. Refine the design.
As inventors, it is our job to design and build products in the simplest way possible. Choosing the right parts, materials, and manufacturing processes all have an impact on both the design and the final cost of the product.
This all starts from the first time you sit down in front of the computer. Choosing the right designs, manufacturing processes, and materials are one of the most important parts of the inventing process. Work out every detail of form, fit and function now, before a single part is ever cut. Doing so will greatly reduce any problems you have down the road.
Be careful with all the information you read on the internet. Most of it is written by people who have never manufactured anything. They are simply cutting and pasting the same information over and over to get your clicks.
The design and manufacturing process is not as hard as it seems but it doesn’t take time to learn. Make sure you do some research, watch Youtube videos and visit some manufacturing businesses in your area.
4. Make your first parts.
Once you have your design, it is time to make your parts. In the last steps, we discussed the various types of manufacturing processes but you will still need to find companies to make a handful of your parts.
There are many 3D printing services, laser cutting and CNC manufacturers available on the internet. All you need to do is upload your files, enter your credit card information and wait for your parts to arrive in the mail.
5. Improve the design again.
After what will seem like forever, your parts should arrive in the mail. It will be time to do some rough assembly and make sure everything fits. Don’t get too worried if you made some mistakes. This is all part of the invention process.
Go back to the computer, correct your design and order parts again. You simply keep doing this step until your product is perfected. It may take you many times but each time you redesign, your product gets better.
6. Make improved parts.
At this phase, you may have ordered parts many times but also noticed you have fewer and fewer mistakes. Your product has gotten better over time and you aren’t ordering as many reworked parts. Once you have all the finished parts, its time to move on.
7. Assemble your prototype.
This is actually where many inventors get stuck into an endless loop of never completing their prototype. At some point, you have to let go and say that the product is complete. If you have done everything correctly up until this point, you will know deep down that you have done everything you can.
8. Test your final product prototype.
Congratulations, you have created your first invention. It is no longer an idea and instead, sits in front of you. It may not be what you originally imagined but that is part of learning how to be an inventor.
One more thing to keep in mind regarding your prototype. Here at Invention Therapy, we believe that a prototype should be a 99% ready to market version of our product. The more work you do now during this phase, the fewer issues you will have once you are ready to manufacture your product.
If you have followed our advice so far, you probably had most of your parts machined, stamped or laser cut so there is no excuse for not being ready for mass production at this point.
If you do need molds, 3D printed parts are fine at this phase but are aware that molded parts must be designed in very specific ways. Just because you can 3D print a part, it does not mean that it can be injection molded.
Adapting and changing your designs is one of the most important disciplines you will learn. Once you build a few products, the process should become second nature. You will also learn many tricks along the way to save time and money.


Are you ready to become an inventor?
Getting your idea out of your head and into your hands is only the first in a long set of steps towards becoming a successful inventor.

First Steps To A Successful Invention
At Invention Therapy, we believe that the power of the internet makes it easier than you think to turn your invention idea into a reality. In most cases, you can build a prototype and start manufacturing a product on your own. Changing your way of thinking can be difficult. Being an inventor requires you to balance your passion with the reality of having to sell your products for a profit. After all, if we can't make a profit, we won't be able to keep the lights on and continue to invent more amazing things!

Please subscribe to our Youtube Channel!
