

At some point, your child is more than likely going to turn to you for ideas on what they can do for projects they need for school. Here are some easy invention ideas for your kids’ school projects.
Let’s say you have a little inventor on your hands, and they’ve come to you asking for help on some invention ideas for school. It’s no secret you haven’t been to school in over two decades, so how exactly and what exactly could you do to help your child succeed in his project? Not only succeed in his or her plan but also something to spark those creative juices?
We’ve created some ideas below that are sure to blow the minds of the other students. They should also impress the teacher, allowing your child that A+ he or she deserves. Keep in mind that these ideas are more for children in grades kindergarten through sixth, but I’ve found even in my adult years they are still pretty fascinating. Read on to find out 8 easy invention ideas for school projects!
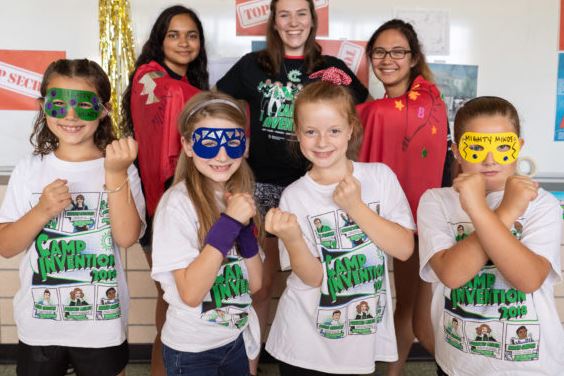
The Camp Invention Program
Before we get into the 8 easy inventions for school projects, your child may benefit from attending the Camp Invention Program. It is funded by National Inventors Hall of Fame, and runs during their summer break. This amazing program can turn any little creative mind into a successful and confident junior inventor.
This summer camp program focuses on science, technology, engineering and math (STEM) allowing children to experience hands-on problem solving along with fun and exciting experiments. Kids grades K through 6 who attend this camp participate in many activities and learn about the process of invention. This fun program also helps nourish the individual creativity of each student.
One of the best things about Camp Invention is that they know any child can be an inventor. The emphasize that each child has something unique and different they can bring to the table. Many skills are taught at the camp like confidence building, innovative designs, entrepreneurship, STEM, and much more.
If you are looking to sign your child up, you can view the program and registration information here.
Schedule and Costs
The Camp Invention program actually takes place in over 1,600 locations nationwide, typically occurring in the summer months of June and July. If you visit the website above to sign your child up for registration, you will first be able to add in your city, state, and zip code to find the nearest programs.
Each program varies on the cost, and also the length. However, most programs (no matter the area) will cost you around $250 to $300 for usually four to five days (30 to 35 hours). You’ll be able to check the price and exact locations, as well as how many days and hours the program will be before you ever register, so there are no surprises.
Easy Invention Ideas for School
- Fruit-powered lights and clocks
- Egg drop crash test dummy
- Duct-tape wallets
- Smartphone projector
- Toilet paper roll Kaleidoscope
- Popsicle Stick Christmas Ornaments
- Balloon Powered Car
- Stethoscope
Before you read on to find out some elegant invention ideas, it’s important to note that any of these projects can be made relatively easy. The real question is if your child would like to make them. These are merely suggestions of materials that could work best with the project in mind. Please allow your child to be as innovative as possible with their invention. Maybe even challenge them to find other materials that would work that are not listed. After all, people who experiment with new ideas make the best inventors.
1. Fruit-Powered Lights and Clocks
What you will need:
- At least eight lemons or any other acidic fruits
- pennies, dimes
- copper wires
- paperclips
- lightbulbs/clocks that you are trying to power up
Optional:
- LED lightbulbs
- zinc-covered nails
- alligator clips
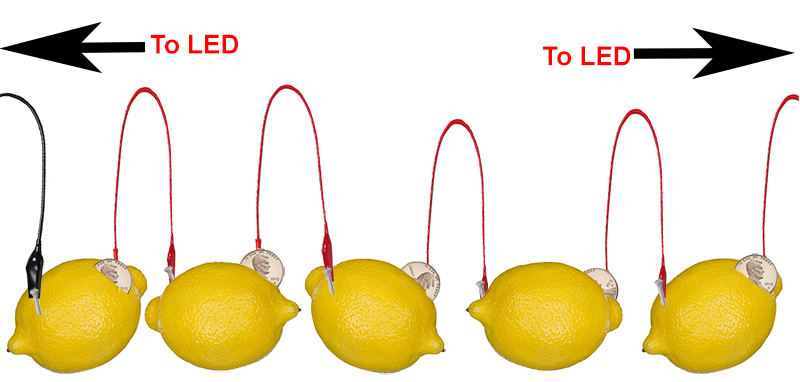
Like the battery-operated potato, many fruits can act as a conductor or to power up inventions. When you create the fruit-powered light, you’ll connect lemons (or any fruit) together by inserting copper wires between them. The image above shows how you will be connecting the lemons for your fruit powered light.
First, you’ll roll the lemons on the table to release the juices being careful not to break the skin, then cut two small slices in the lemon that are about half an inch apart. Now you’ll need copper wire, one more piece than the number of lemons to be exact, attaching a penny to one, a large paperclip to another, and your choice of another penny or another paperclip on the last. Connect each one so that every lemon has one penny and one paperclip inserted into those small slices, and with the last wire, you’ll want to attach it to your lightbulb by the negative and positive ends.
With lightbulbs, you may want to try different amounts of lemons, depending on the size of the bulb. You can even power up LED lightbulbs with zinc-covered nails and alligator clips for lower voltage usage. Keep in mind that only small light bulbs or LED lights will glow. The lemon battery does not create enough current to power anything larger. You will have to experiment in order to find something that the fruit battery is able to power.
2. Egg Drop Crash Test Dummy
What you will need:
- cardboard
- tape
- cotton
- egg cartons
- bubble wrap
- rubberbands
- ladder to drop at various heights
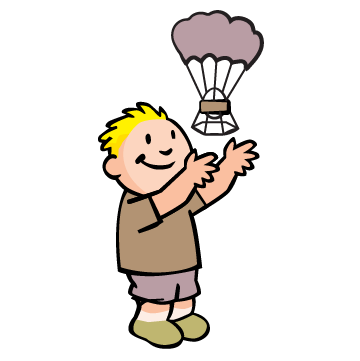
This invention might take several tries, but that’s how you learn – practice makes perfect! Every child and young tween loves dropping eggs, whether it makes a mess or not, but they will feel even more accomplished if they can create something that cradles the egg and keeps it from bursting. This age-old invention and creation have been amongst the most popular in the books for many years.
One of the coolest things about the egg drop container is that you’ll be able to make this invention entirely your own. There isn’t really one specific look or style that you have to make to make this work. You can build any type of container you would like, paint it any colors you want, and it can be any size you would prefer it to be. The design is all up to your child!
An important thing to remember about this invention is that it will need to be tried several times and from several heights. Also, there may be some math involved. The distance, the velocity of the egg, the impact of the hit, all must be considered and noted. Your child will need to understand this every step of the way.
3. Duct-tape Wallets (and other items)
What you will need:
- duct tape, preferably at least two rolls that go well with each other
- design in mind
- scissors with adult supervision and/or help
Optional
- clear tape
- velcro
- add buttons and other accessories to the final product
- hot glue gun only under adult supervision or adult help
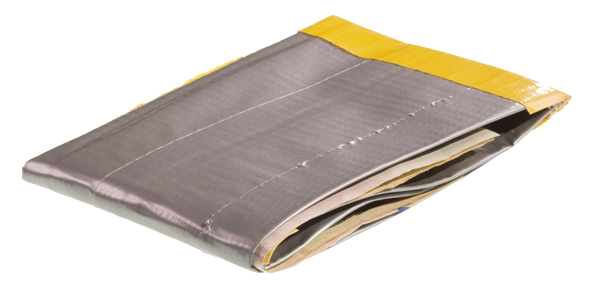
The duct tape craze took over quite some time ago, but it is still one of the more recent inventions on the list. Duct tape wallets are pretty popular amongst elementary and middle school students, so it’s appeasing for many different school projects and many ages.
You don’t have to just focus on wallets, of course, you can make purses, tote bags, beach bags, make up bags, flip flops, and many accessories. There have been other ideas created out of duct tape, but maybe your child will come up with something even more extravagant. Duct tape projects allow the child to show their inner designer as they can create any item they want, and their originality will still show in the design, the colors that are chosen, the way they build and tape the thing, and much more.
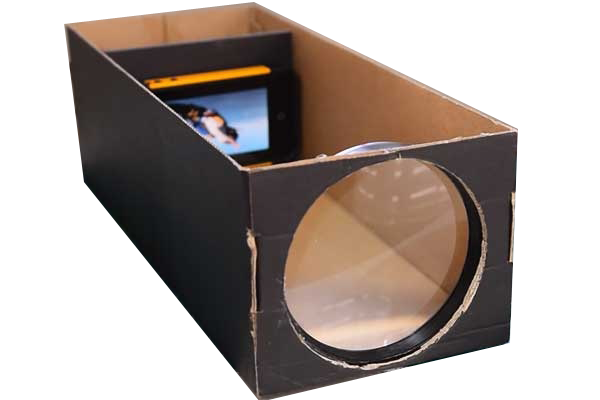
4. Smartphone Projector
What you will need:
- tape
- cardboard
- a magnifying glass, fresnel lens or camera lens
- scissors or Exacto knife with adult supervision or help
- a cell phone, preferably a smartphone
Whether your child has a phone or not, let them borrow yours for this project and ask their teacher to hold it before the presentation starts and to return it once the presentation is over. This invention is actually really pretty cool and might score some sweet points with your child’s classmates and teacher.
You will need a cardboard box that is open at the top and cut a hole on one side where you will be taping the magnifying glass or camera lens.
Fresnel lens will work great for this type of project. Those are the flat magnifier sheets you find at ou local book stores.
Fold up a small piece of cardboard by taping it, creating a stand for the phone to sit while projecting. The phone will sit directly in front of the glass or lens. It works best when locked into landscape mode and upside down. You’ll also want to consider how far the phone is from the lens or glass to create the sharpest projected image.
5. Toilet paper roll Kaleidoscope
What you will need:
- toilet paper rolls or paper towel rolls
- tape
- thick sheets of paper like mirrored or Mylar sheets
- scissors with adult supervision or help
- white cardstock
- markers, stickers, any materials to decorate
- flexible straw
The Kaleidoscope invention is typically a massive hit in the classroom in that it shows off many sides of a young inventor’s personality. To create this beautiful project, you can start with painting your cardboard roll if you’d like, although that is totally up to you. Secondly, you’ll cut your sheets into three equal strips that will end up fitting nicely inside of the roll.
Line those three sheets side by side, taping them together with the shiniest, least scratched side facing down and the side that isn’t as pretty facing up with the tape on it. Now you’ll take these three strips and fold them up to make a triangular shape that is going to fit directly into your tube. Take the flexible star and cut the part that bends and twists off to tape on the side of the tube.
With the cardstock, you can cut out three circles and decorate these three circles any way you’d like, just remember, this is what is going to be shown while looking through the kaleidoscope so encourage your child to create those spin wheels as creatively in different sections as they can. The more creative they get, the more amazing the images they will see.
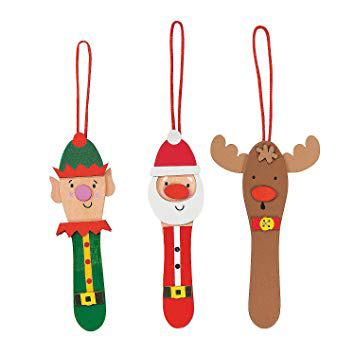
6. Popsicle Stick Christmas Ornaments
What you will need:
- popsicle sticks
- twine
- cardstock of different colors depending on the ornament
- glue
- sharpies or markers that will not wear off
- any materials you will want to use for direction (cotton balls, paint, glitter)
Kids of all ages love making unique ornaments to hang on the Christmas tree, it shows the little inventor’s artistic side but also their personality. Furthermore, it shows where their heart lies, with their family.
One of the best easy inventions for school projects that kids love more than anything is creating their own decorations. You can create the ornament any way you would like. No matter how big or small, your child has the say-so in the entire creation of this project.

7. Balloon Powered Car
What you will need:
- plastic bottle
- straws or wooden skewers
- balloon
- bottle caps
- tape
Boys and girls alike love toy cars, maybe it’s the obsession with turning sixteen and being able to obtain a driver’s license. Mabe they dream of roamingthat you can roaming world, but for now, they are still at home. Children absolutely love toy cars. So, why not invent one?
To prepare your invention, you’ll first need to cut one straw in half and tape it to one side of your plastic bottle. Then you’ll cut one of the wooden skewers in half, pushing it through one of the straws to form your axles. To make the wheels, you will cut a small hole in the center of each bottle cap and place all four as wheels on the ends of the skewers.
To finish off the car, you’ll cut a small hole in the top of your bottle, opposite of the axles and wheels. This is where the second straw will go through by inserting it through the hole on the top and allowing the other end to come out of the hole where you would normally drink from the bottle. Lastly, you’ll tape the balloon to the end of the straw that is on the top, right where you made your hole in the bottle, and be sure that the balloon is sealed and airtight.
To test your new balloon-powered car, you will simply blow up the balloon and hold your finger over the end of the straw that is coming out of the mouthpiece of the bottle itself. Once you release your finger from over the hole of the straw, you’re ready to race!
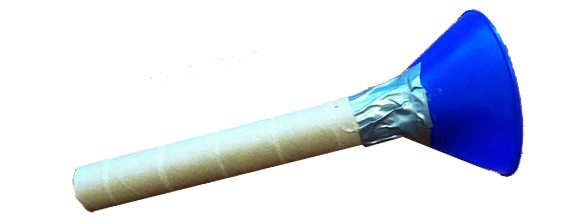
8. Stethoscope
What you will need:
- paper towel tube or a flexible tube
- funnel
- duct tape
- balloon
- scissors
Children love playing doctor, and stethoscopes have become a popular invention that is a big hit in the classroom. First, you’ll take the smaller end of the funnel and put it into one end of the tube, pushing it as far as you can to secure it. Use duct tape, preferably to tape them together.
Then you’ll need to inflate the balloon to get it stretched out, let the air out, then cut the neck off of the balloon. You will need to take the balloon now and spread it over the open end of the funnel and duct tape that into place as well. The end of the tube will go near your child’s ear to hear, while the funnel end will be placed over the heart.
Challenge and Encourage your Little Inventor
While these types of projects are fun and help your child learn how to become a successful inventor, you should also encourage them to come up with their own ideas for school projects. Besides, it’s usually the inventions that haven’t been heard of yet that end up being the most popular.
Always encourage and challenge your child to be as creative and original as they can be, whether they choose an invention on our list or not.

Are you ready to become an inventor?
Getting your idea out of your head and into your hands is only the first in a long set of steps towards becoming a successful inventor.

First Steps To A Successful Invention
At Invention Therapy, we believe that the power of the internet makes it easier than you think to turn your invention idea into a reality. In most cases, you can build a prototype and start manufacturing a product on your own. Changing your way of thinking can be difficult. Being an inventor requires you to balance your passion with the reality of having to sell your products for a profit. After all, if we can't make a profit, we won't be able to keep the lights on and continue to invent more amazing things!
Please subscribe to our Youtube Channel!
